One reason that I chose this house is because it has so much space. There's loads of closets, and just square footage in general. The master closet is 12' 6.75" deep, by 6' 5.5" wide. That's a good sized closet!
I decided to start the interior remodeling in an out-of-the-way place, just to get a hang of the several things that I needed to do that I'd never actually done before. Also, I needed to have the master bedroom finished so that I could settle in there, while I worked on the rest of the house.
When I moved in, this really large room had a ton of poorly used vertical space. There was a simple closet bar going all the way around, along with a single shelf.
The drywall was in bad shape, and there were some water stains along the ceiling from where the roof had leaked around the chimney before I had the roof replaced. The room was also painted a pretty bad color.
The attic port wasn't there before I started looking at the house. I had that added as a part of my purchase contingency, so my inspector could properly look the place over.
Step one was to gut the room. I removed all of the clothes racks, trim, casement, and even the door. I decided to keep the carpet; as it was a decent color, and in really good condition.
After that, I removed the ceiling light, and installed a small temporary one that had space for two bulbs. That would give enough light for all the work that I needed to do. I also removed the cover plate on the light switch.
Next I covered the floor in plastic, to keep the carpet clean. I also put plastic over the entry way into the room, to keep things from spraying out into the master bedroom.
Then I fixed up the drywall. I scraped all the cracks, and then taped and mudded them. I filled any holes, or dings as well.
From there, I textured the walls with a heavy knock-down texture. The texture gun that I used was from Lowe's.
The texture was lightweight drywall compound, mixed with a bit of water. This had to be mixed down roughly to the consistency of cake batter. Enough so that it would pour down into the texture gun's hopper; not enough so that it would run down the walls, or drip off the ceiling, once sprayed.
After the texture was sprayed, I went back and knocked it down about 15 minutes later. That was done with a wide plastic drywall scraper, intended for that purpose.
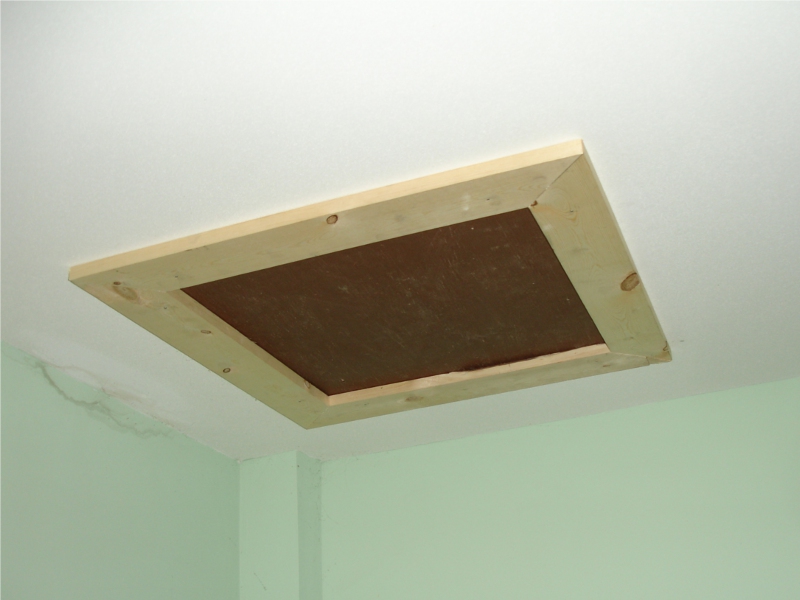
At this point, I had to cut and texture a piece of drywall to go into the attic hole in the ceiling.
While all that dryed, I put a coat of paint on the casement and the base trim. I went with a satin white interior latex paint for that. I decided to use tall white base trim, and standard white casement throughout the entire house. It provides a nice balance to the kinds of colors that I planed to use.
Next up, I primed the walls with two coats of flat white wall primer. The spots where there were water stains took a few extra coats. I have decided to leave all of the closets in the house primed only, and not to paint them. This is to keep them brighter, as there's no natural light in them.
Next up I did added a proper looking ceiling light, and switched out the wall switch with a white one. I also replaced the heat register and switch cover plate with new white ones.
After that, I installed the door. I really liked these 3 panel shaker style doors. They're made of oak. These are what I will be using throughout the entire house.
The casement and base trim was cut and installed next. I started with the casement at the door, then did the casement at the ceiling opening. Once all the casement was in, it was time for the base trim. I attached all that with 3" trim nails, after I went around and marked the locations of the wall studs. Those were installed using a pneumatic nailer, not by hand!
Once the trim was up I went around with white paintable caulk, and filled all the nail holes, edges, and joins. Filling where the base trim and casement meet the wall really makes for a nice, finished look. The final step for the base trim and casement was to touch up the paint on it where the caulk went.
The final step was to install a proper closet organizer. This is a custom organizer, created from components of the Rubbermaid closet organizers that are sold at Menards. It's a bit pricey to do it this way, but it makes for an excellent use of space. I have about three times the storage space, and about twice the clothes hanging space that the closet had when I started this project.
That was it for the master closet! My first interior renovation project in the house.
I hope you got something out of this.
Much of the interior work in other rooms has been the same; as it regards gutting the room, texturing, priming, painting, replacing electrics, jambs, casement, and base trim.
I have much more to share, some of which will be rather significant.
Next up: The Master Bedroom.


No comments:
Post a Comment