I haven't posted in a while, that's mostly a factor of how super busy I've been doing actual work. Hopefully I can get a few posts cranked out here.
This one will be about the upstairs deck replacement.This deck is off of the master bedroom, on the second floor of the house.
Step one was to tear the old deck apart. This was mostly a matter of backing out all of the screws, and prying out the ones that were too painted or rusted up.
There was some hassle getting the first deck board off. That's the one that was against the house/patio door. The thing was really heavily siliconed into place. Likely by whoever had repaired the rotten joist board (see the next few paragraphs for info on that). I ended up just slicing the silicone it up with a razor. I did have to take a trim piece off at the bottom of the door. It required some serious cleaning to get all of the silicone off of it.
When the deck was completely disassembled, down to the joist boards, I discovered that the joists were the same boards that ran into, and across, half of the house. That made the prospect of replacement really difficult.
At some point in the past, there must have been some issues with this deck. The South-most board must have rotted. I say this because that board was sistered with a new piece of treated lumber, that went from the end of the deck on into the house. Sure enough, the original board in that location was in pretty bad shape on the its bottom side. The repair looked to be well done, so I saw no reason to attempt to improve upon it. I believe this rot to be yet another factor of this house not having gutters on it for most of its life.
Considering that replacing the joists wasn't going to be an option due to the fact that they supported half the house; I decided that I was going to have to strip the paint from them, and then treat them. There ended up being several layers of paint and primer on them. To strip them, I used the SmartStrip product that I referred to in my blog post about cleaning up the front porch. After plastic-ing and taping the house and sidewalk below, I brushed the stripper on heavily, then covered it all in plastic for an evening.
The next day, about half of the paint scraped off very easily. At that point, I decided to break out the random orbital sander to remove the rest of the paint. I could have applied more SmartStrip, but the stuff is a bit cost prohibitive.
After 7 or 8 hours of sanding work (bleh!), the boards were free from paint. I treated them twice with water sealer at that point.
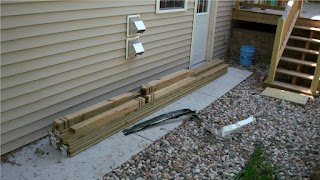
From that point on, things came together fast. The deck went together very much like the larger deck I blogged about earlier. Step one was to attach the rail posts. Step two was to cut and attach the deck boards. Step three was to build and attach the hand rails.
The only other issue that I ran into with the project was where to put the corner posts. Because the deck supports that go down into the ground where attached at the corners, I couldn't properly attach posts for the handrails to match the lower level deck.
I compromised by buying two extra rail posts, and attaching them all right next to the main deck support posts. That meant that the hand rails wouldn't go all the way to the corners, but the gap was small enough to still meet building code requirements.
Well, that's it for now. I have a few more out doors posts to cover, but I may just begin on the inside posts. There's several of those ready to go.


This blog is very inspiring. I found best exterior home remodel service for my home and want to share here. Thanks
ReplyDelete