As you can see in the pics, the main deck on the house was in dire need of attention
After I had the place resided, this gray/blue color looked really out of place. This pic is from right after I removed the pool along with the raised portion of the deck that surrounded the pool.
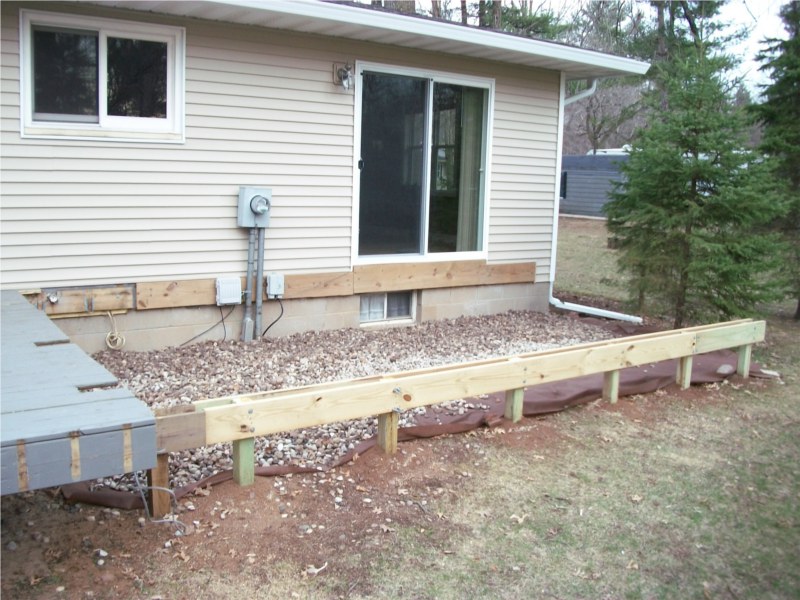
When I had the contractor do the siding, I had a header board put in place for the deck expansion that I knew I would eventually do.
Step one was to cut out the South end of the old deck to make some space. After that I was ready to start digging post holes to support the new deck. Once the posts were all in place, I attached the main deck support beams.
I should note here that each of the support post holes was dug down 4' 4", and a 4" thick and 12" across octogonal concrete pad was dropped into each hole. I leveled the bottom of each hole as best I could, before dropping the pads in there. The bottoms of the holes were compacted with a long 4x4 before the pads were dropped in. This was done to ensure that there are no frost issues, as this home is in Central Wisconsin where we get a good 7 months of winter some years.
Step two was to clean up the ground that would be under the deck addition by ripping up any trees, bushes, and other plants. After that I graded it away from the house, raked it all smooth, laid down landscaping fabric, and then put 4" of landscaping rocks down. This will keep the underside of the deck looking clean, and maintenance free.
Next up was the demolition of the old deck. I ripped up the old boards with a hammer and a prybar, after cutting across them with a circular saw in a few different places. At first I tried unscrewing each deck screw, but that wasn't possible. They had about 4 layers of paint gummed into the screw holes, and it was impossible to get the drill bit in there.
While doing the landscaping under where the original deck was, I realized that the supports that were holding up the old deck were wiggling around quite a bit. That shouldn't have been the case, had the supports been properly buried. I gave them a tug, and was dismayed to find that they were only buried about a foot and a half deep. Once I realized that; I had to rip them out, and add 4 more properly buried supports. This was unfortunate, as it would mean additional materials and time were required. I did it anyways, since I wanted the new deck to built properly.
While digging one of them, when I got about 3' down; I hit the house's main iron sewer pipe. I ended up just moving the hole over 3" so that it was next to it, not on it. Fortunately no damage was done to it when I hit it with the shovel.
From there, I was ready to start building the new deck! Stayed tuned for part 2...


No comments:
Post a Comment