When I purchased this home, there was no Master Bathroom. There was this really weird side room in the hallway, that shared a wall with the Master Bedroom.
As you can see, it was some kind of craft room or something; maybe an office.
Regardless of what it originally was, when I saw it, I had a vision.
These pics are all from the day I moved in. Look at this weird light fixture. Pretty dated, huh?
I knew the tub would go into the spot where the desk and shelves were, it was a perfect spot for it. I also knew where the shower would go, as well as the new door.
The first thing I needed to do after ripping the flooring out was to fix the big buckle in the floor that parralled the wall. It was bucked a good half inch in some places.
I hacked out the buckled section, shaved down the joists, then put in a new subfloor section.
Here's the state of the room at that point.
The vent on the wall here had to be moved over one stud bay, because it was originally right where I wanted the shower.
The next thing I did was started ripping out drywall.
In the above picture, you can see that I had to cut out a whole wall in order to add the door.
The only part of this whole job that I hired someone for was the rough plumbing. They ran feeds, drains, and vents for me that tied into the house's existing system.
Here's the original room entry, all framed up. I had to move the central vac line from the far side of the hall (where a new closet door was being added), to this side of the hallway. The pipe for it is laying in the center of the pic below.
You can see the rough plumbing has all been done at this point.
I set the tub in myself. I ended up having to make a mortar base for it, as that's what this style of tub called for. It was a mess, but was relatively easy to get level.
The wall here on the other side had no sheet rock on it. There's a bathroom on the other side, and what you're seeing in the center is the back of the main mirror.
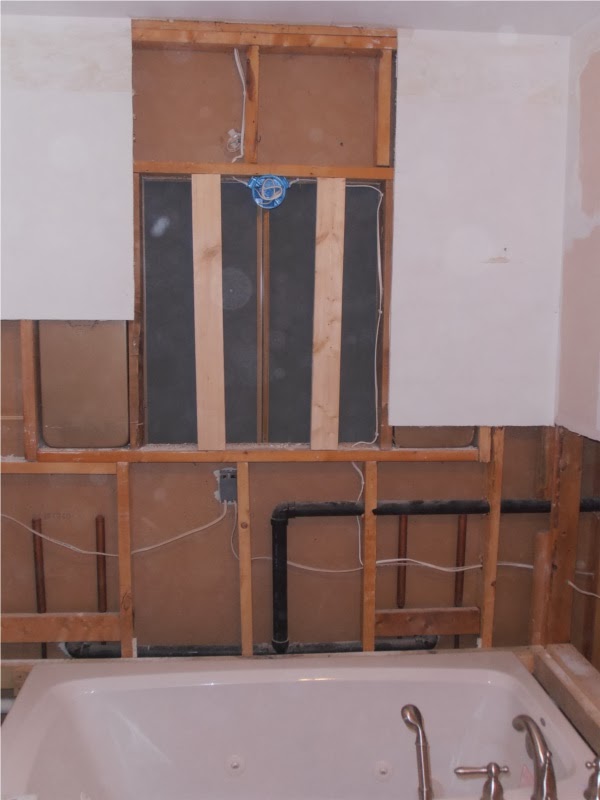
You can see in these pics that I ran all the electrical work when the walls were cut open. It was pretty easy that way. In some places I cut out more drywall in order to run electrics. Somehow that seemed like less of a hassle than trying to snake through the walls.
In this one, I have the hallway drywall in place on the other side of the wall.
This is where the shower will go. You can see in the pic where I moved the heat return from one bay to the next one over. It required reworking some vent work in the room downstairs, which wasn't a huge deal since it has a drop ceiling.
After that, I put everything back together.
It took a handful of months to get it done. I'd work on it a few hours a week, as I felt like it.
This was more wall tile than I'd ever done before!
I made sure to add plenty of lights, as there's no window in there.
The shower enclosure is made by Vigo Industries. It's a 3/8" glass frameless neo-angle model, 38" wide. All the tile designs I came up with as I did it.
For the floor I used 18" tiles, to make the room seem larger.
That's a quartz top vanity, from Menard's.
The mirrors are just framed glass that I screwed right to the wall.
That's it for this project! It took forever, but I saved a ton of money and learned a lot by doing it myself.
As you can see, the results speak for themselves!


Thats an awesome job Johnny!
ReplyDeleteWolfe